I didn't think about that, makes sense, i'd clear it I guess, then again, one day my POS will be a flat color of some type for easy touch up haha


I didn't think about that, makes sense, i'd clear it I guess, then again, one day my POS will be a flat color of some type for easy touch up haha
97 XJ Clayton Longarms 35s locked etc.
94 YJ MTO
98 5.9 ZJ Limited alllll original
02 Cummins 6spd HO Studs, Sticks, Box, Pump...
Just another idea try spraying in a different direction that may take care of some of the cloudiness.
[URL]http://www.youtube.com/watch?v=8gD5vDm_Cx0[/URL]
I tried that but still couldn't get it. I searched and I think I came up with what I was doing wrong:Originally Posted by jlovbasz3

I guess in trying to avoid runs, I was holding the can a little too far from the surface. I thought sanding it down would remove the cloudy marks but it looks like I might have to go over it again with color.b. Another common defect in spraying is mist or fog. These defects are caused by the following:
(1) Over atomization caused by:
(a) Air pressure too high.
(b) Fluid pressure too low.
(c) Wrong air cap for material used.
(d) Wrong fluid tip for material used.
(2) Improper use of gun caused by:
(a) Incorrect stroking.
(b) Gun too far from surface
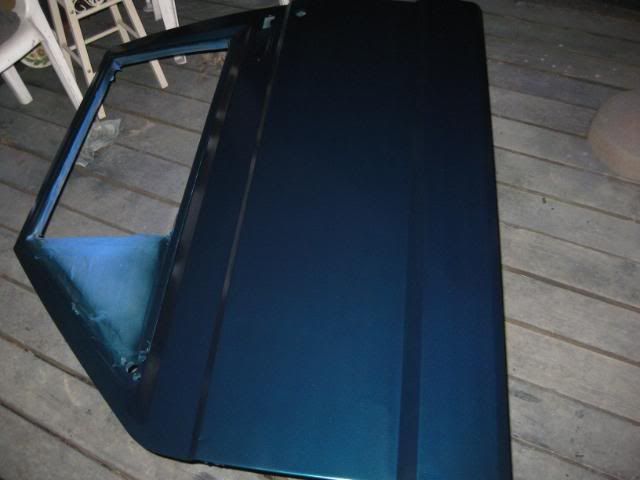
Okay, so I went over it again in color. This time I held the can a lot closer (6" instead of ~10) and got good results. You can see it's a lot darker and no more chalky stuff.
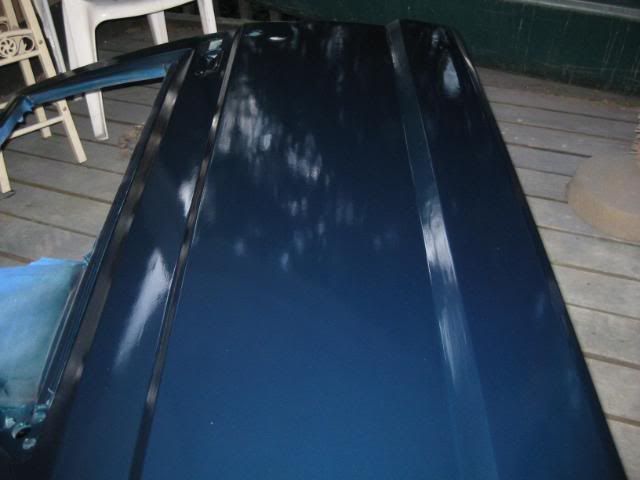
...and here it is with a clear coat:
(The line at the bottom is the reflection from the canopy roof)
You can see it shines but it's more of a dull shine. That's what they call "orange peel" because the texture is like that of an orange peel...
So what's next is I'm going to sand down the clear with 600 grit (I really don't want to do this) then I'll lay down a very light coat of what they call a "guide coat" which is nothing more than a powdering of a primer (very light, almost see through). After that sets up I'll sand that down with 1500grit or 2000 grit using the guide coat as a guide to keep from going too deep into the clear. What's left will be a flat looking paint job. Apparently it's supposed to look like it was just sanded. Then, I'm going to buff it which will make it shine like a mirror because it will have removed the orange peel texture.
Wow, that's a mouth full. Next time I'm going to take it to a shop lol.
Last edited by Deadman 94 xj; 05-27-2010 at 08:54 PM. Reason: my spelling sucks
Heat the hole freeze the shaft
I never heard of anyone putting a guide coat on for clear it is usually done in the prime stage for high and low spots from body filler.I'd say wet sand it with 3000 - 4000 grit to knock down the orange peel then try to hand buff it to bring up the shine.But it looks real good from the pic!
[URL]http://www.youtube.com/watch?v=8gD5vDm_Cx0[/URL]
Thanks! I really appriciate your input. It usually leads me down the right path. I don't recall ever seeing anything over 2000 grit. I can see the point of going higher but honestly everything I've been reading recommends 2000. I'm just a little worried about screwing up the clear coat but we'll see what happens.
I never heard anything about a guide coat either but this is what I read. I just don't really see the point since it's done AFTER the initial 600 grit sanding. I'd think that would go through the clear faster than the 2000.
What's supposed to be done is the sanding gets done at 600 grit. The guide for that is the actual clear coat. If I see shinny spots than those are high spots that still need to be sanded. I guess I just have to be very careful not to go too deep. Then is the guide coat, followed by the 2000.
I will be buffing by hand. I don't know anything about buffing like this really. I guess I'll apply the compound and go to work with a good cloth.
I do enjoy doing this though; even if it is just a door. I can't imagine doing a whole vehicle by hand!
Heat the hole freeze the shaft
Don't lay a guide coat down over the clear. Just wet sand, wet sand, and wet sand. get one of those foam blocks and wrap your sand paper around and keep the surface wet. This will help so you don't clog up your paper. Try a finer grit first, 1000-1500, and see how your clear is holding up to the sanding. There will be a noticeable difference in the high/low spots (shiny vs. not). Take your time and good luck.
99 TJ
11 Ram 1500
Ok so no guide coat. Do you not recommend the 600 step? The reason I ask is because I think the 600 would be a little too rough but might be necessary to get rit of the peel.
I got the sponge to keep the sand paper even
Heat the hole freeze the shaft
Yeah, I'd skip the 600. It's been quite a few years since I did any finish paint work, but if memory serves, the 600 would bee too aggressive and cut through with relative ease on the ridges/corners. If you try the finer grit and you are putting in a lot of effort for very little return, you could always go rougher. The clear will not fully harden for a few days, so it will still be pretty easy to work with.
99 TJ
11 Ram 1500
Okay, thanks. I see what you're saying. It's better to start off light than risk screwing it up with the 600. I don't know how long they let the clear cure where I read about the 600. I'd imagine it was longer than what I'm working with.
NO 600!!!! thats just nuts. i grew up in the body shop, and after clear is laid id say 1400 or higher. maybe start with 14 and go in 3 stages to a 2k grit. no need for more than that i think.
[QUOTE=jackb1;233598]...... but I never stuck my head that close to his pipe to check it out.[/QUOTE]
but wait, are you going to be wetsanding the WHOLE rig? if not its going to look ridiculous. just keep that in mind. cause factory paint is not wet sanded to get the orange peel out of it.
[QUOTE=jackb1;233598]...... but I never stuck my head that close to his pipe to check it out.[/QUOTE]
Thanks for the complement. It's a jeep. It'll be a mess in a couple of months. I'm enjoying the process more than what I care it's going to look like when it's all said and done. And here is where I got the info on 600 grit...expert.
http://www.hotrod.com/techarticles/b...ing/index.html
Heat the hole freeze the shaft
heres why i say no to 600 grit. your not using a traditional spray set up are you? unless i missed something, which is possible, i thought you were rattlecanning it. and i wouldnt think that the thickness of that clear is enough to hold up to 600 grit. im no expert. im just going off of what i learned/remember. use what u want, i just hope it turns out like u wanted.
and i didnt mean to sound like a dick in the last post(as i re-read it it seems what way kinda) i just wasnt dure if you knew or not.
as we all have said. as long as ur happy with it, thats all that matters.
[QUOTE=jackb1;233598]...... but I never stuck my head that close to his pipe to check it out.[/QUOTE]
That makes sense. Thanks. Yes it is a rattle can job. So you're point on it not setting like a traditional spray makes sense. I'm not trying to make it perfect. The whole jeep is dented to hell lol. The ONLY reason I'm replacing the door to begin with is because the other door won't open from being dented in so bad.
What I didn't want was a different color door, or a flat painted door when the rest of the jeep still shines. So I figured I'd start this as a little project for my self and post it up for some good advice...and maybe somebody else likes this stuff.
It's not going to a show-n-shine any time in it's life
Heat the hole freeze the shaft
Last little update for a while...
I got the door on. It looks great!
Also put in a Durango steering box. It's from a 99 w/o snow package. I got it for $60 shipped from 51 auto out in Smock PA. You can find them on carpart.com.
Heat the hole freeze the shaft
Bumping a 4 yr old thread because I miss it.
Heat the hole freeze the shaft
Missing the XJ? lol.
this is what happens when you take 8 years to finish a build. all the guys you WERE going to wheel with are doing other stuff now lol.
taking unsafe rigs to a whole other level
I had a few too many beers and started missing the XJ...lol
Ryan, you'll be back. Plus all I really wanted to do was sit in it in the garage and go vroom! vroom! How many jeeps have you had since I started the CJ build? lol
I found a couple pics of the XJ on Facebook from the guy I traded it too in illinois:

Heat the hole freeze the shaft
pffffffffffff you'll wish you had time to sit in it and say vroom
you in a few months.
taking unsafe rigs to a whole other level
There are currently 1 users browsing this thread. (0 members and 1 guests)
 Posting Permissions

 Reply With Quote